Using the flow designer you can use your AI agent to send emails to your team (AI Agent send email).
NB: The sending of emails by this component is done with a generic Athics email address (crafter-bot@athics.ai).
If you want to send the email with your Company domain or other personal email you will have to configure the SMTP protocol settings by selecting the node “send an email with SMTP”.
For example, you can implement a troubleshooting system that allows users to report a problem by sending a screenshot directly to the support team.

To do this, open the flow designer and add a new node, as shown in the example below:
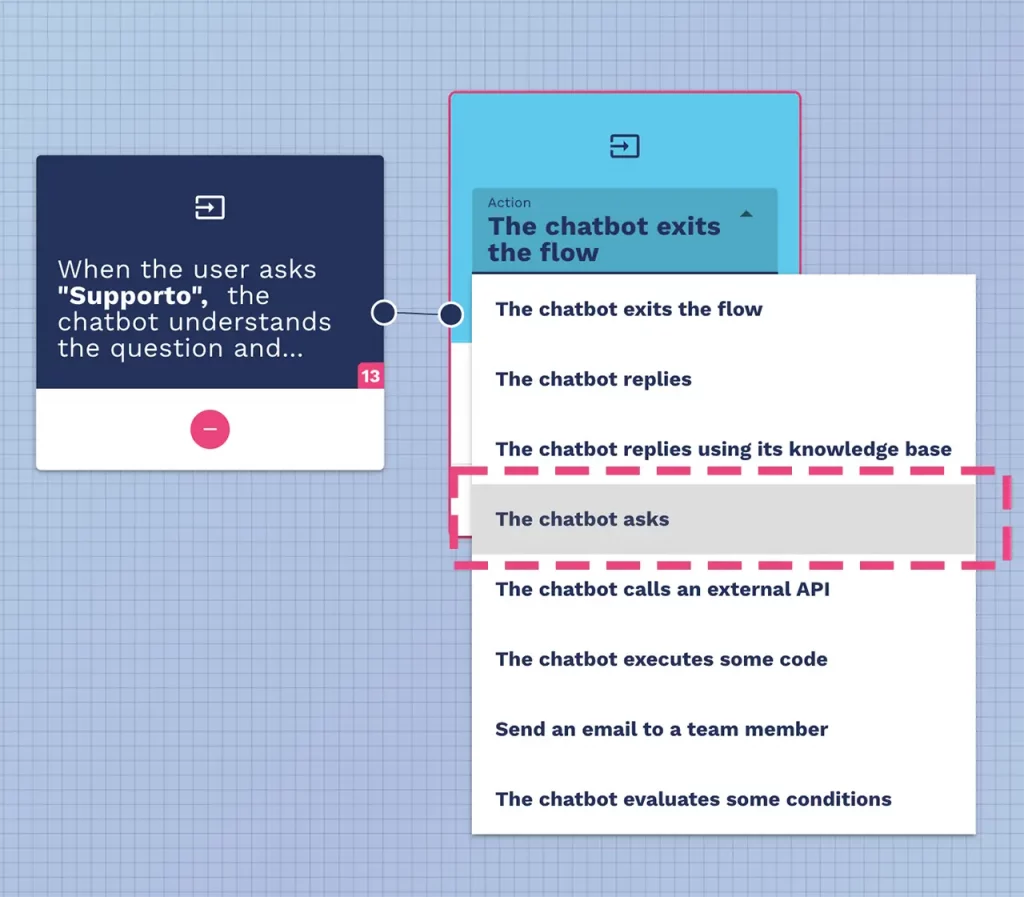
Add the node and fill in all the fields as shown below, in particular:
- Assign the question with which the bot will start collecting information
- Assign the name of the variable where the user’s answer will be saved (ex. customerName)
- Choose the type of answer that the chatbot must give to the user.
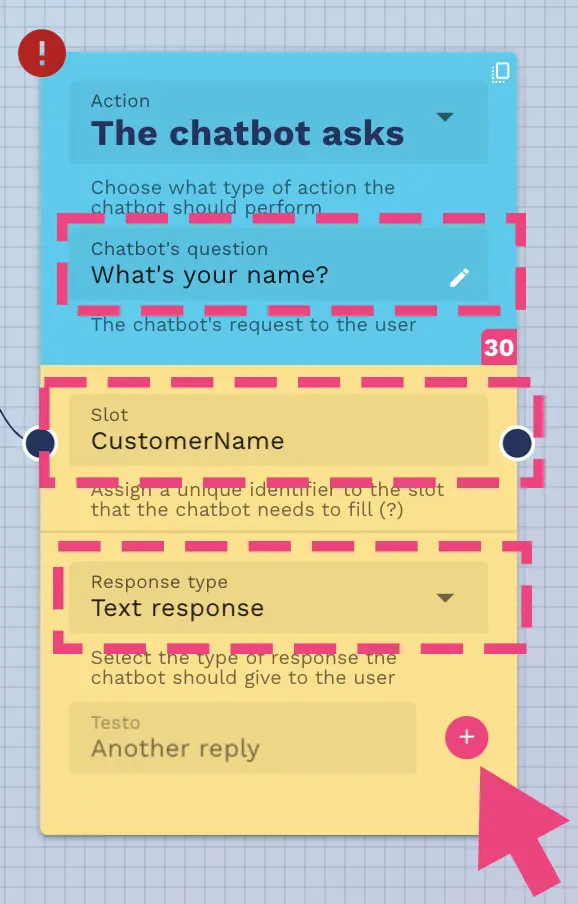
Continue the flow by clicking the “+” button.
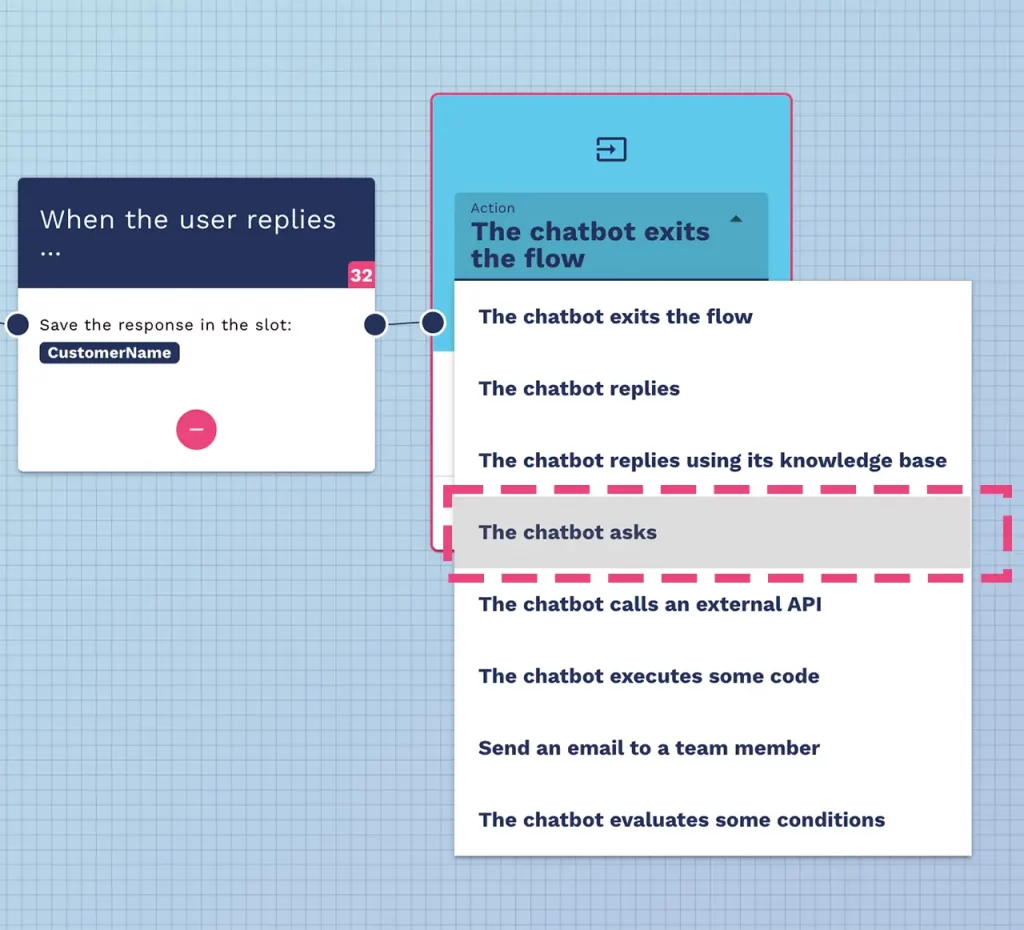
As you can see in the figure below, the user’s answer will be saved in the “CustomerName” variable.
Continue by adding another question from the user:
Continue by adding the required information. Please remember to save the information in variables with different names.
In this example we used “customerEmail”, but you can use any name you like.
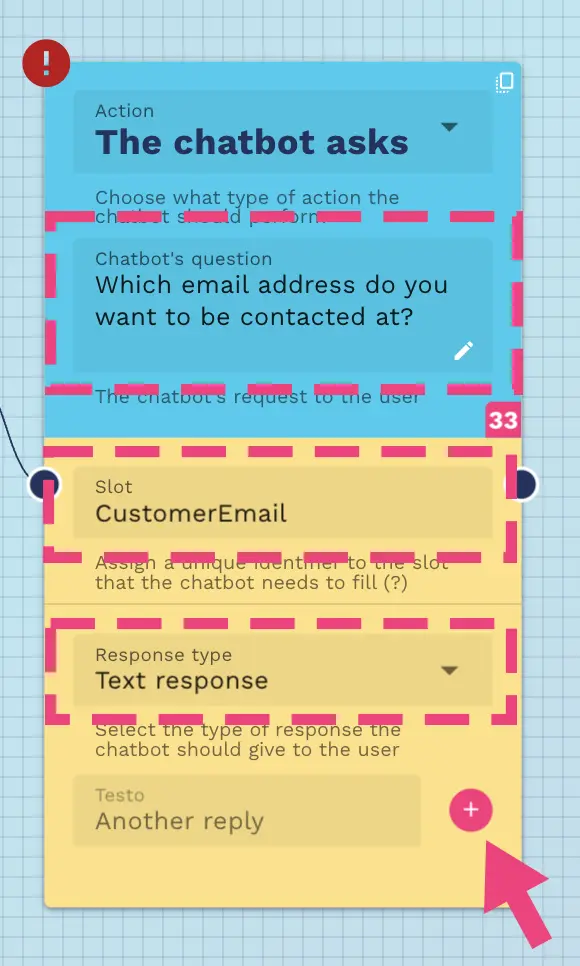
Continue by clicking on the “+” button to save the variable and continue with the flow.
Continue by adding information, as shown above (always remember to always give a different name to the “slot” variable).
Now select the option for the user to send a file, as shown in the figure:
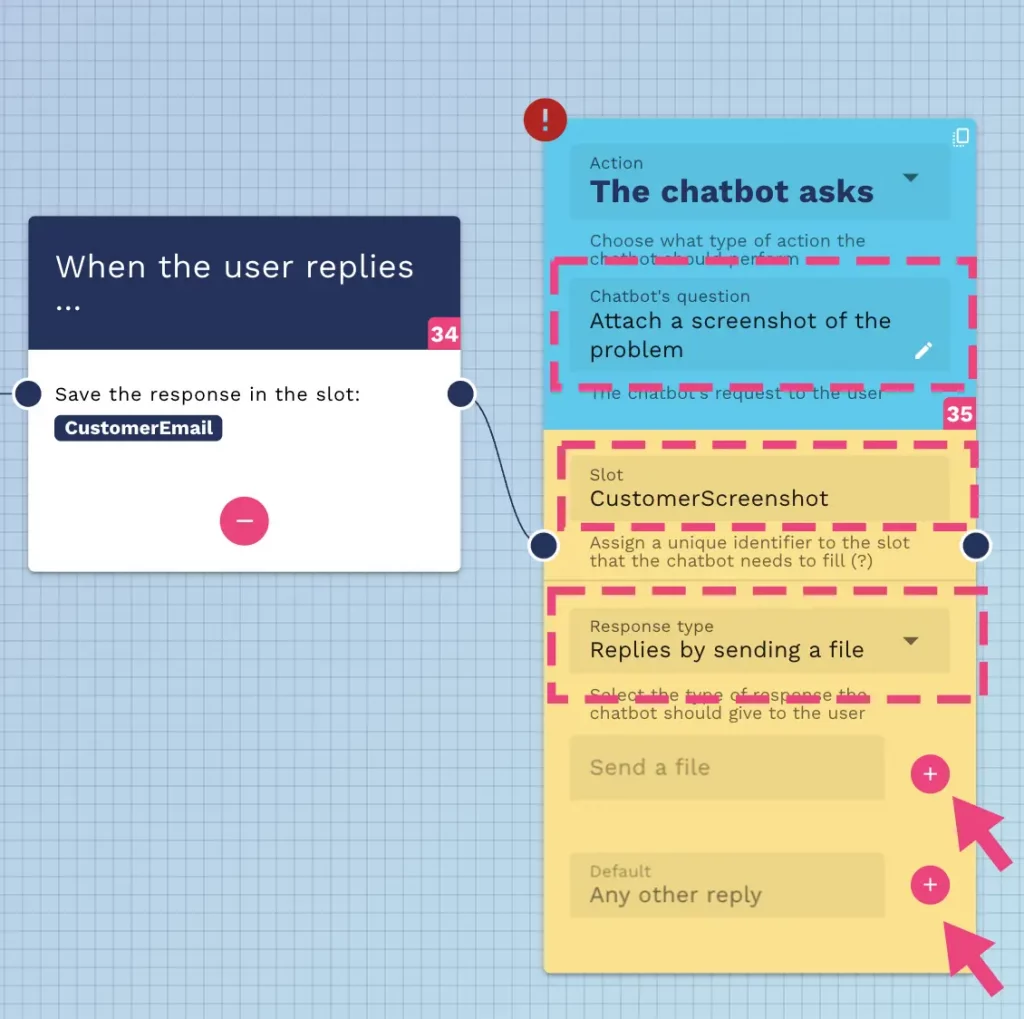
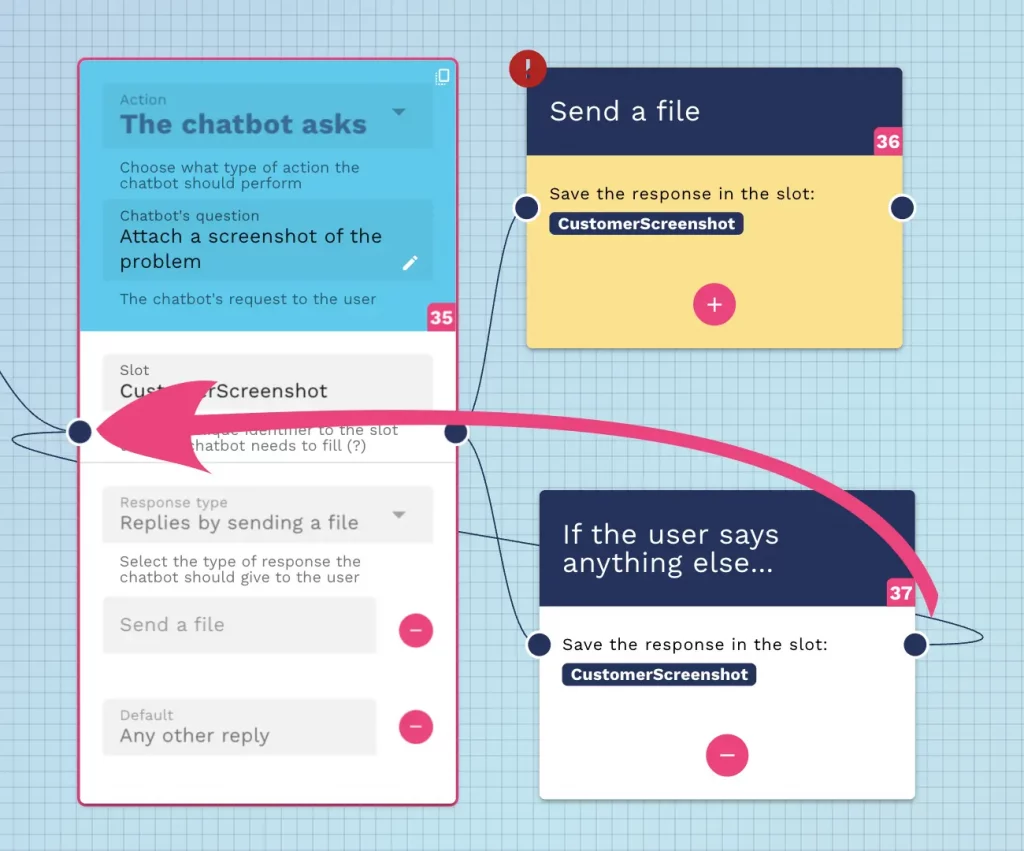
At this point, if the user sends a file, they move forward with the support request, while for any other response they will be redirected to the previous request again.
NB: this is just an example of use, so you can define the behavior as you like (for example, you can skip this step, or you could provide the user with the reason why it is important to send the file and so on …).
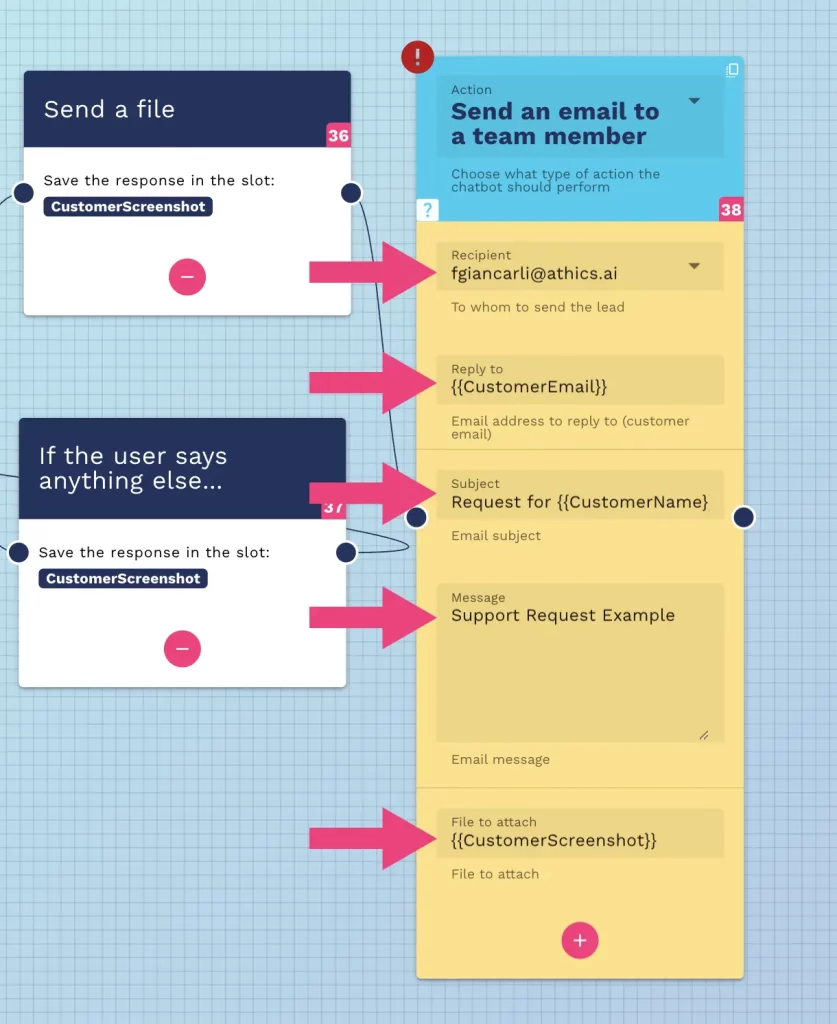
Now continue by adding the form for sending emails and enter all the requested information.
- Enter the recipient of the email (the emails in this select are those of the users assigned to your team. If you need a particular email, add the new user among the members of your team: see how to add a user to your team)
- Add the customer email provided previously and saved in the variable “customerEmail”. NB: use double curly brackets to recall the variables.
- Write the subject of the email
- Write the body of the message
- Insert the attachment (in this case the screenshot provided by the user)
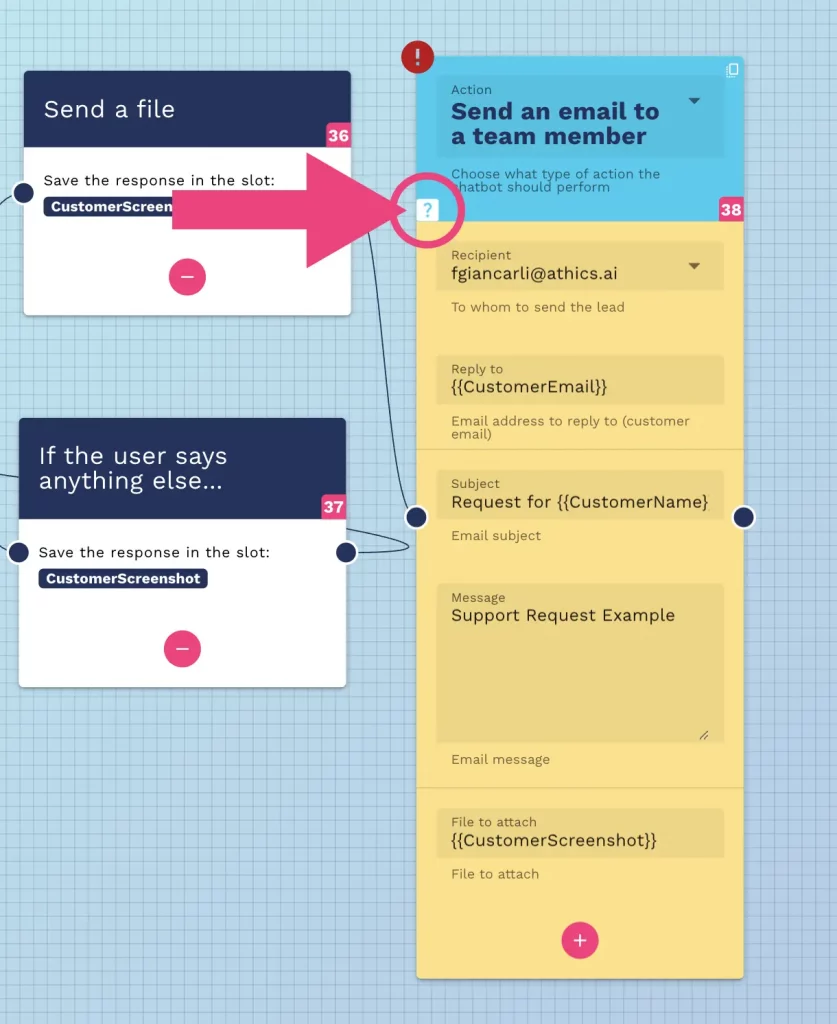
NB: The sending of emails with this component is done with a generic Athics email address (crafter-bot@athics.ai).
If you want to send the email with your company domain or other personal emails you will have to configure the SMTP protocol settings by selecting the node “send an email with SMTP”.
Click on the “?” button to immediately access the documentation explaining how to do it.
Add the last block to thank your user and finally exit the flow.
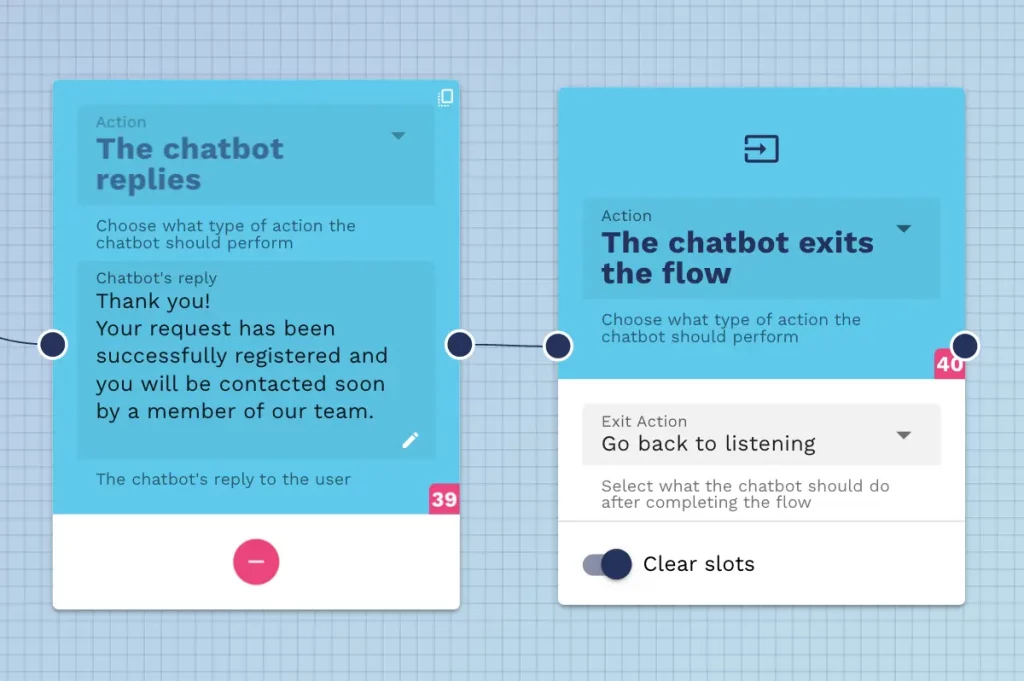
NB: The platform automatically saves the changes, but just to be safe, press the save button before exit.
